Configuring your site
1: Registering your domain on Godaddy.com
To register your domain on Godaddy.com you need to register with Godaddy.com, if you are not registered. If you are already registered then login to your account and shop for your domain.
- Registered users click on this link to Sign-In: https://sso.godaddy.com/
- Non-Registered users click this link to Sign-Up: https://sso.godaddy.com/account/create

For e.g., if you want to register your domain name as jonhywalker.com type
jonhywalker.com into the above input field and click on Search Domain
button.
jonhywalker.com is available for registration then it will show below
screen:
2: GitHub repository
Let’s understand fastn project creation in just 5 minutes by playing!
With this, we are also going to create our new fastn website by following the very short embedded tutorial.
Do you have a GitHub account?
Log in with GitHub.com into your GitHub account.
Or
Create your GitHub account by following simple steps by the GitHub sign-up process.
Now as you signed into your GitHub account, let's start creating our first fastn website project on GitHub.
To start with it, create a repository using fastn-template - Click here
Click on Public to make your fastn website visible to the public. You can click on Private in case you want to keep it private. We recommend keeping the Public selected.
You can also add a description of your fastn website (optional).
Once you click on theCreate repository from template button your first ever
fastn web repository is ready.
Edit your repository README.md file and remove default content from it.
Follow the below steps to make your firstfastn website live.
- Click on the
Actionstab and check for the green tick, if the Update README.md workflow ran successfully.

- Click on the
Settingstab and followStep-1toStep-5shown in below image:
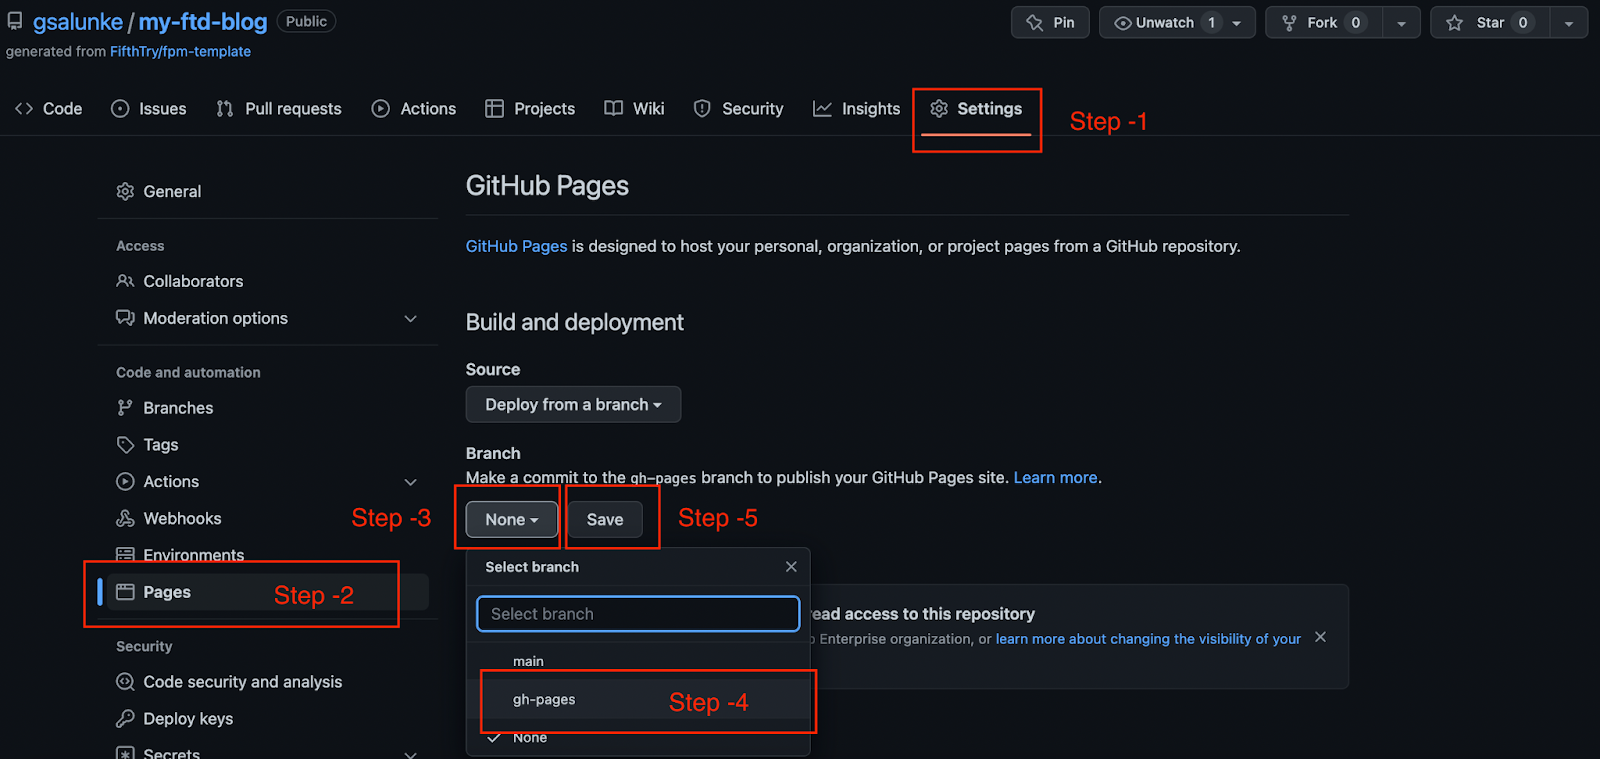
Settings tab follow Step-1 to Step-5- Click on the
Actionstab and check for the green tick, ifpages build and deploymentworkflow ran successfully.
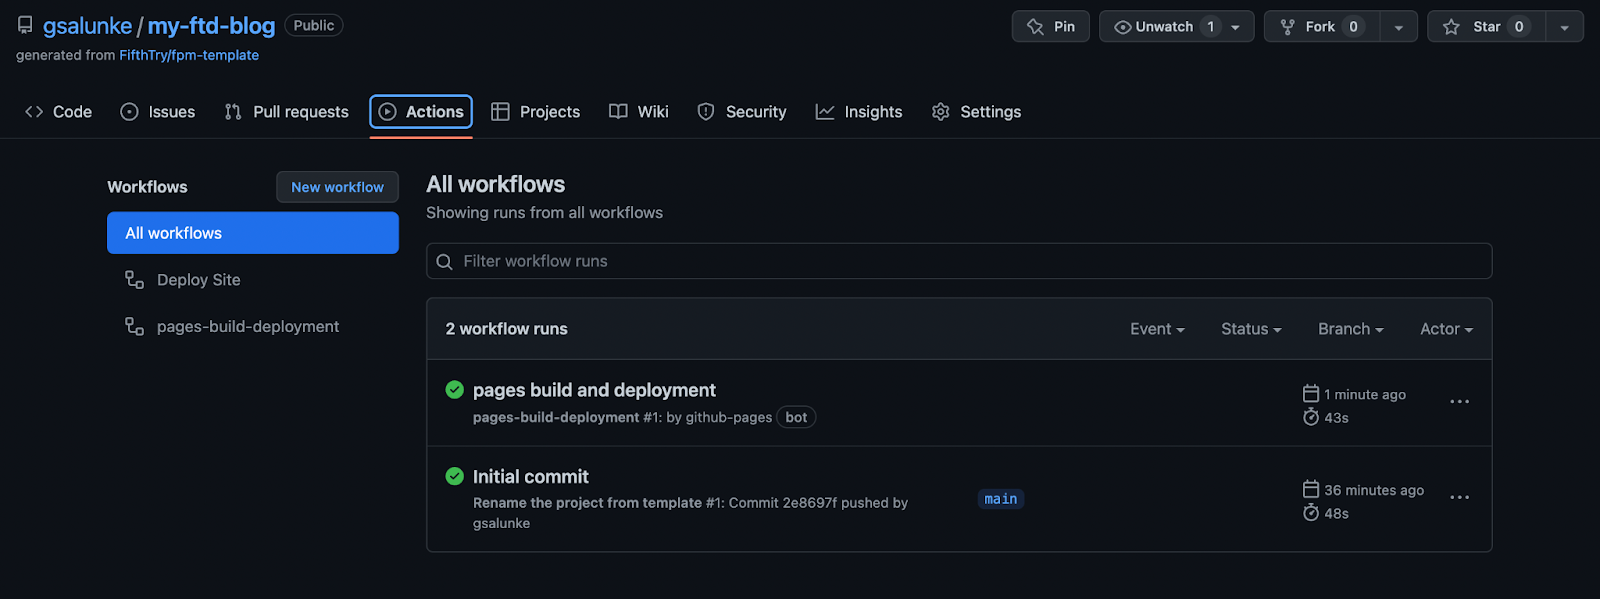
Once pages build and deployment ran successfully. Your first fastn website is
live.
Settings tab and follow the below steps: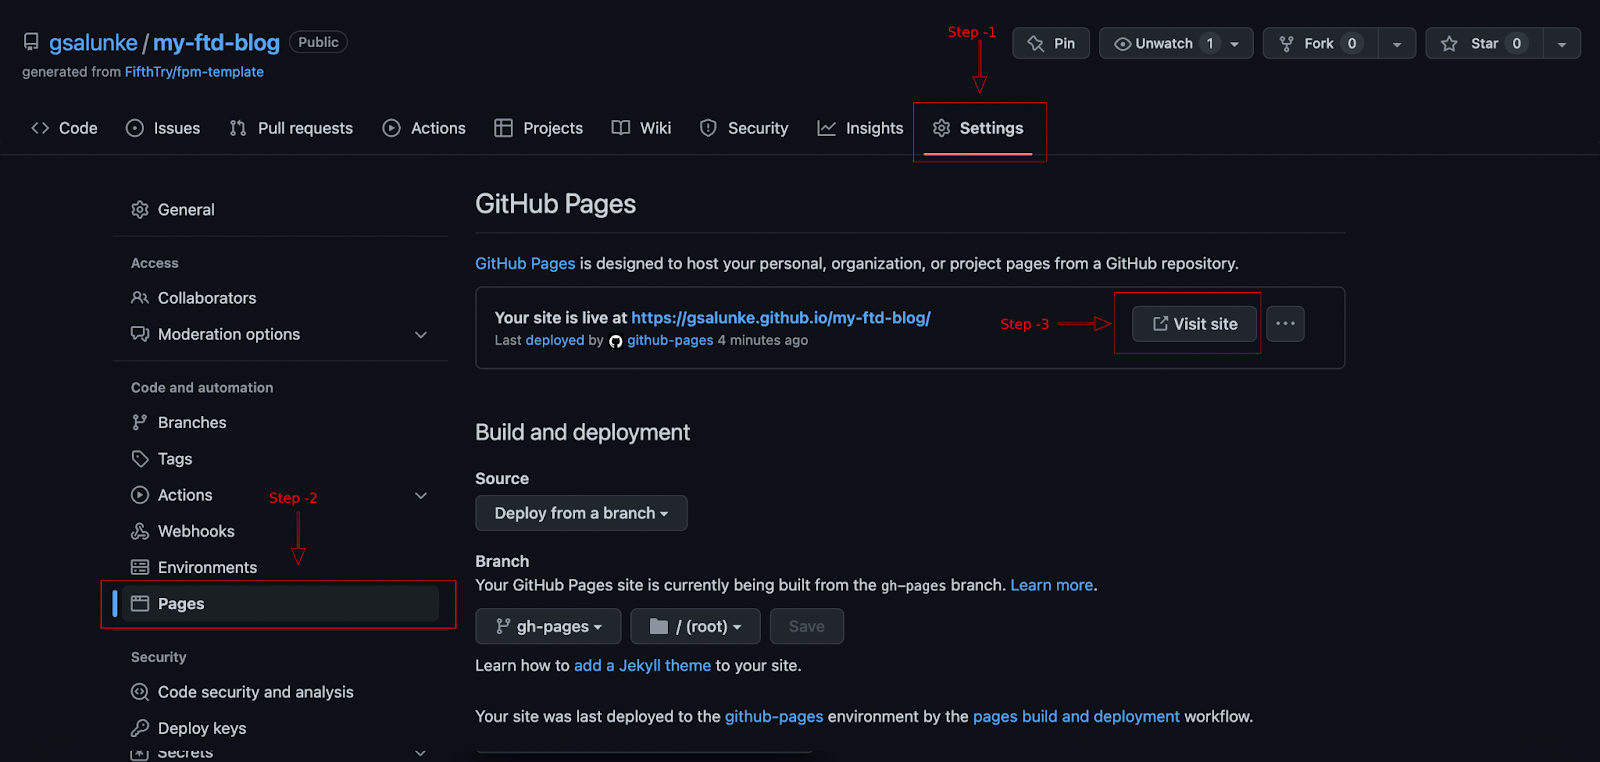
Visit site button3: GitHub repository link to Godaddy website
We have already registered your domain using Godaddy.com. Let’s link your GitHub repository with your website by adding DNS(Domain Name System) configurations to it.
Follow the below steps to add DNS configurations:
Visit GitHub documentation to update DNS configurations. To open - Click here.
Go to Step No. 5 - Keep this documentation open in the browser tab
Switch to the new tab OR go to the Godaddy.com account dashboard and follow below steps:
- Click on your user name and select the My Products link from the dropdown menu.

Or
- Change your .com domain name from the below URL: https://dcc.godaddy.com/manage/jonhywalker.com/dns

- Click on Add button below the box that will appear on the screen. Click on Type and select A from the dropdown menu. As shown in Step 1 and Step 2

In the Name field type @
In Value enter 185.199.108.153 ip address(refer Step No.2 from this document)
- In TTL click on dropdown and select custom option and enter value
600

- Add all 4 IPs A records mentioned in GitHub documentation (refer Step No.2 from this document)
185.199.108.153 185.199.109.153 185.199.110.153 185.199.111.153
Repeat Step 7 to Step 10 from this document.
Once you add all four A record IP addresses. Then start adding AAAA records
2606:50c0:8000::153 2606:50c0:8001::153 2606:50c0:8002::153 2606:50c0:8003::153
Repeat Step 7 to Step 10 from this document. And select AAAA record instead of A record.
- Editing CNAME record: on the same screen you will find the CNAME record click on edit icon

- You will see below the CNAME record box opened for editing

Update the Value shown in the above image and click save. CNAME value is always your GitHub username and github.io
So if your GitHub username is johnywalker75 then your CNAME value will be johnywalker75.github.io
Your Godaddy domain configuration is ready.
- Go to your GitHub repository and click on Add file dropdown and select Create new file,

- Enter filename as CNAME (without any extension)
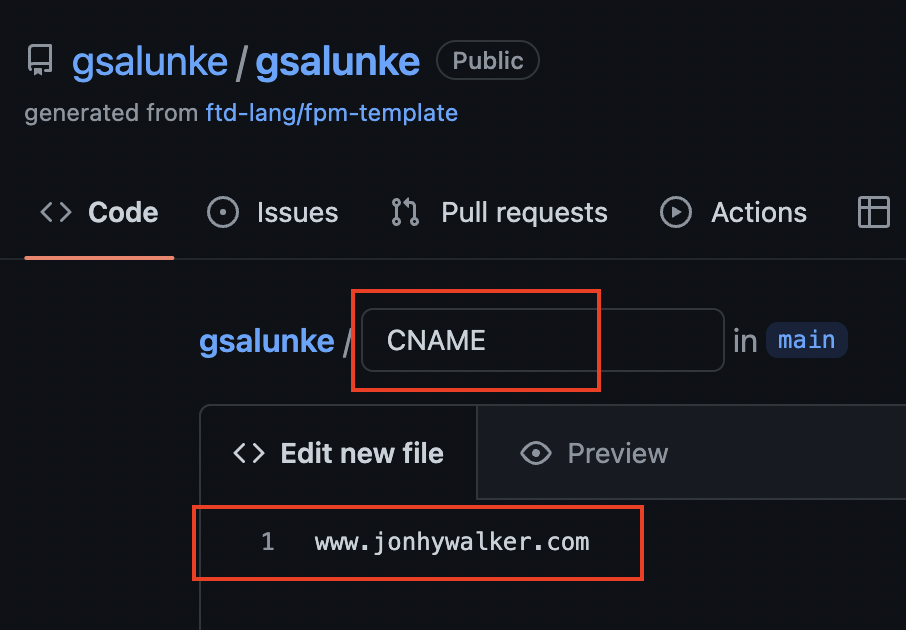
Click on the Commit new file button. A CNAME file will be created on your repository root directory.
- Click on ⚙️ Settings and select the Pages link from the left sidebar. Scroll down to Custom domain section and add your domain name into the custom domain input box,
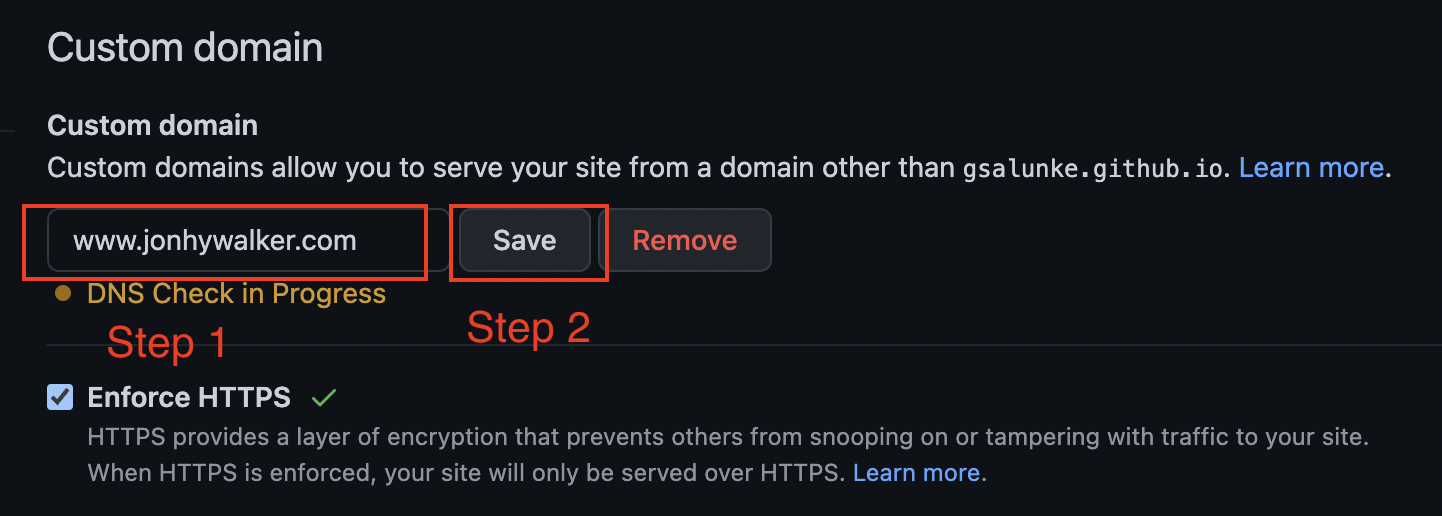
- Click on the Save button and Once the DNS check is done you can click to enforce HTTPS for your domain.
www.johnywalker.com domain is now public live.
